 Creating roof objects
|
Command |
Workspace: Path |
|
Create Roof |
Architect: AEC Landmark: Landmark > Architectural Spotlight: Spotlight > Architectural |
To create a roof object:
Select the walls, polygon, or polyline that the roof will be based upon.
Shift-click to select multiple walls. If the building has an attachment, such as a garage, that will have a different roof structure, then select only the desired walls.
When the roof object is based on walls, the walls are automatically associated with the roof when determining component display.
Select the command.
The Create Roof dialog box opens. Enter the desired criteria to create the roof object. The parameters are illustrated in the roof diagram. Certain default parameters are suggested based on the selected roof parameters.
Click to show/hide the parameters.Click to show/hide the parameters.
|
Parameter |
Description |
|
Eave Profile |
Select the roof edge appearance Square: angled fascia, soffit edges Vertical: vertical fascia, angled soffit edges Horizontal: no fascia, horizontal soffit edges Double: vertical fascia, horizontal soffit edges |
|
(1) Vertical |
Specifies the vertical length for a double cut eave |
|
(2) Horizontal |
Specifies the horizontal length for a double cut eave |
|
(3) Thickness |
Specifies the roof thickness; when the roof face is styled, this parameter is not available since the components determine the thickness |
|
(4) Bearing Inset |
Specifies how far the bearing wall cuts into the roof |
|
(5) Roof Pitch |
Specifies the roof pitch as an angle or rise/run ratio; click Calculate for an automatic calculation based on bearing height, eave height, and eave overhang |
|
(6) Bearing Height |
Specifies the height of the rafter plate or top plate above the wall layer elevation where the roof will be supported; click Calculate for an automatic calculation based on roof pitch, eave height, and eave overhang |
|
(7) Eave Height |
Specifies the height of the lowest portion of the roof; click Calculate for an automatic calculation based on roof pitch, bearing height, and eave overhang |
|
(8) Eave Overhang |
Specifies the distance that the roof extends beyond the bearing wall; click Calculate for an automatic calculation based on roof pitch, bearing height, and eave height |
|
Hole Cut |
Select the default hole cut type for roof cutouts made with 2D objects (does not apply to holes associated with dormers and skylights). Vertical: Cutout edges are perpendicular to the active layer plane. Splayed: The bottom edge of a cutout is perpendicular to the active layer plane, and the top edge of a cutout is parallel to the active layer plane. Square: Cutout edges are perpendicular to the roof surface. After the roof is created, you can adjust the hole cut setting for each face of the roof object; see Editing roof objects. |
|
Layer |
Assigns the roof object to a layer. By default, the roof is created in the active design layer. To create the roof in a different layer, select an existing layer from the list, or select New Layer to create a new layer. |
|
Class |
Assigns the roof object to a class. The standard roof class, Roof-Main, is available as an option and if it is selected, it is created in the file if it did not already exist. Alternatively, select Class to create a new class. |
|
Style |
From the Resource Selector, double-click a roof style to apply it; see Using roof styles. |
|
Convert to Unstyled |
Converts a styled roof face to unstyled |
|
Roof Preferences |
Opens the Roof Preferences dialog box; see Roof preferences |
|
Create Accessories (Architect required) |
Adds an attic, soffit, or fascia to the roof object; see Adding roof accessories |
|
Retain Original Objects |
Retains the source objects that formed the basis of the roof |
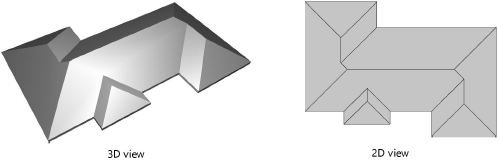
A hip roof is created over the selected objects using the criteria set in the Create Roof dialog box. The roof can be changed to a gable or Dutch hip shape; see Changing the roof edge shape.
